
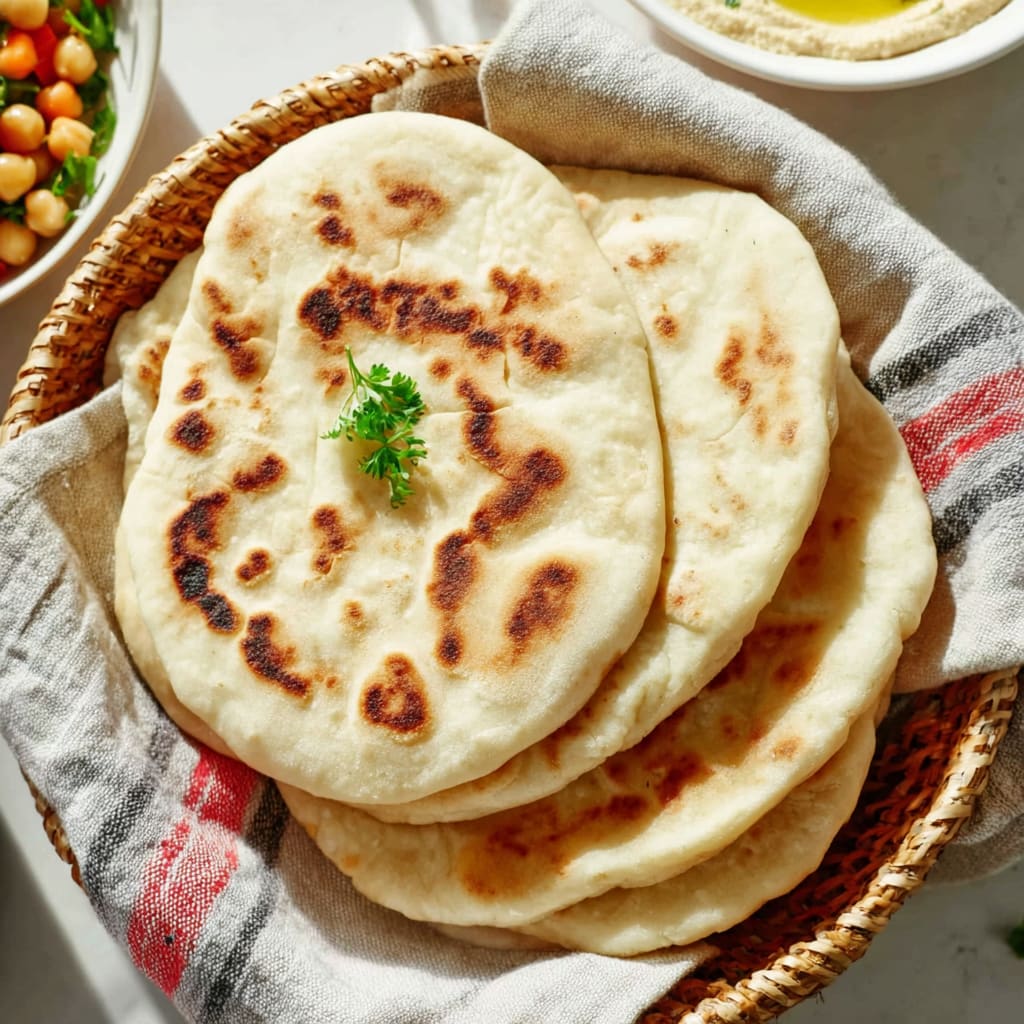
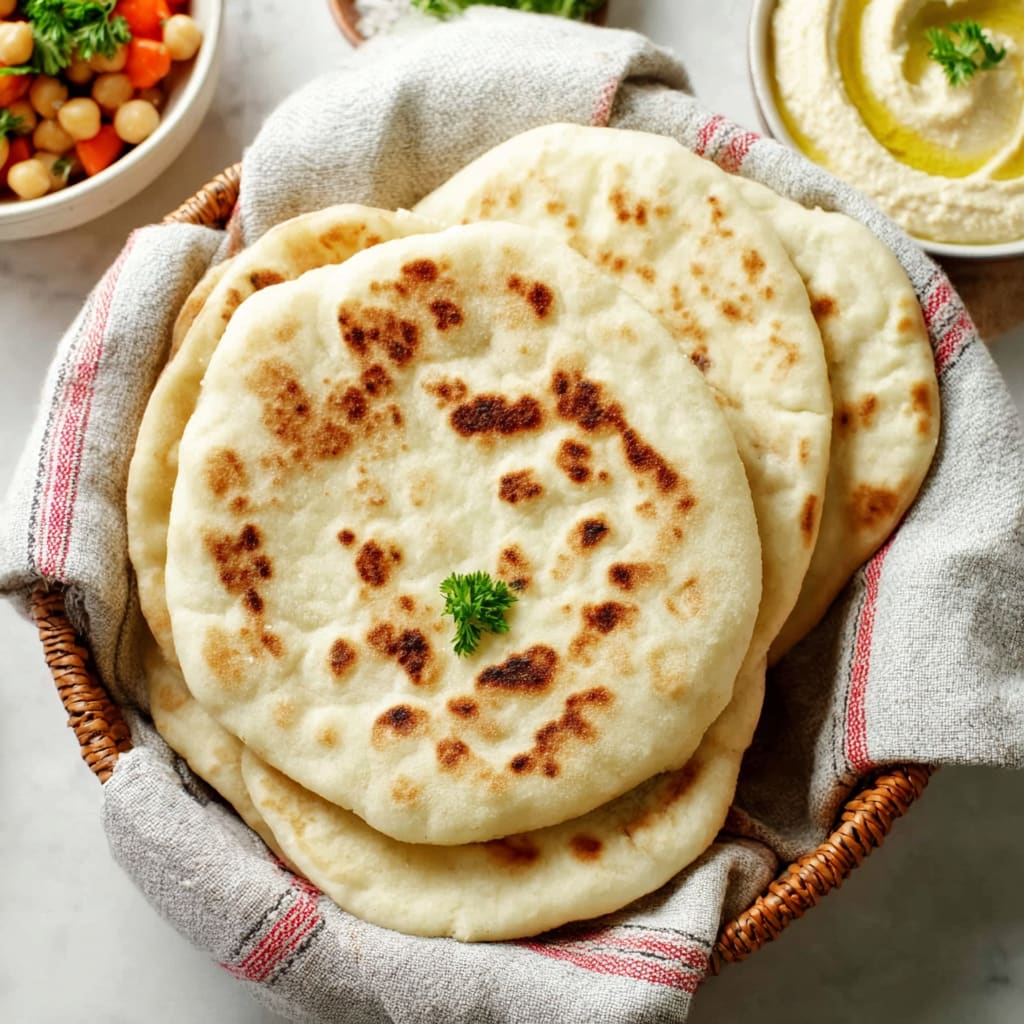
Imagine pulling warm, pillowy rounds straight from the oven, their golden surfaces blistered and fragrant with a gentle wheaty aroma. Homemade pita bread is one of those magical baking projects that delivers extraordinary results with surprisingly simple ingredients. Whether you’re new to bread baking or a seasoned home cook, this recipe proves that fresh, soft pita is completely within reach. Far superior to anything from a store shelf, this version puffs up beautifully and stays tender for days. You’ll learn the exact techniques for perfect pocketed pita every single time, along with stovetop and oven methods, pro tips, and creative variations.
Why You’ll Love This Recipe
Homemade pita bread checks every box a home baker could want. First, the ingredients are pantry staples you likely already have on hand, meaning zero special shopping trips are required. Second, the process is deeply satisfying — watching the dough balloon up in the oven or on the skillet never gets old, no matter how many times you’ve done it.
The flavor is incomparably better than store-bought versions. You get a soft, chewy interior, a slightly crisp exterior, and that subtle nuttiness from whole wheat flour that makes every bite feel wholesome and comforting. These homemade flatbreads are incredibly versatile — stuff them with falafel, dip them in hummus, or serve them alongside a hearty soup.
The recipe is also beginner-friendly. Clear steps, forgiving dough, and two cooking methods mean success is almost guaranteed. Whether you bake them in the oven on a hot stone or cook them quickly on a stovetop skillet, the results are consistently fluffy, soft, and absolutely delicious.
Ingredients List for the Homemade Pita Bread
Gather these simple, wholesome ingredients before you begin. Having everything measured and ready makes the process smooth and enjoyable.
• 2 cups All Purpose Flour plus 1/2 cup for dusting
• 1/2 cup Whole Wheat Flour
• 1 tbsp Sugar
• 1 tsp Salt
• 1 tbsp Olive Oil
• 2 tsp Yeast ((refer notes))
• 1 cup Warm Water
Pro Tips
1. Nail the Water Temperature
Yeast is sensitive. Water that is too hot will kill it, and water that is too cold will leave it sluggish. Aim for water between 100°F and 110°F — warm enough to feel comfortable on your wrist but never scalding. Properly activated yeast ensures a strong, reliable rise and that signature pocket formation during baking.
2. Knead Until Truly Tacky
Eight to ten minutes of kneading might seem long, but it is absolutely essential. You are building the gluten network that allows the dough to trap steam and puff up dramatically. The finished dough should feel soft, smooth, and slightly tacky — not sticky and not dry. Resist the urge to add too much extra flour.
3. Use a Very Hot Surface
Whether you’re using a baking stone or a skillet, heat is the secret to the iconic pita pocket. A properly preheated surface causes an immediate burst of steam inside the dough, forcing it to inflate rapidly. Never place your pita on a cold or lukewarm surface — the pocket simply will not form.
Instructions
Step 1:
Combine all-purpose flour, wheat flour, salt and sugar in a mixing bowl. Stir to mix.
Step 2:
Add the yeast to warm water and stir to dissolve completely. Pour this in the mixing bowl along with olive oil and then combine everything into a sticky mass.
Step 3:
Transfer to your worktop, dust with additional flour and knead for 8-10 mins until you get a soft and tacky dough. (Refer the detailed instructions from the above paragraphs).
Step 4:
Lightly oil the same mixing bowl. Transfer the dough into it, coat it with olive oil from all sides to refrain it from drying and then allow it for first proofing — 2 hours.
Step 5:
After 2 hours lightly deflate the gas and divide the dough into 10 equal parts. Tuck the sides in of it and give it a round shape. Press in the centre and cover with a tea towel. Repeat the process until you shape all of them into roundels.
Step 6:
Take the first dough that you shaped and roll it thinly and evenly to 6 inches in diameter. Place it on a baking tray lined with parchment paper and cover with a tea towel.
Step 7:
Once you have rolled out all the roundels allow it for second proofing — 30 mins.
Step 8:
Preheat the oven to 230 degree Celsius with the baking stone inside. Right before baking flip the rolled out dough on to the stone and bake for 4-5 mins until it is nicely puffed up.
Step 9:
To make it on a stovetop make sure that the skillet is hot. Flip the rolled out dough and place it on the hot skillet. After about 20 sec flip the dough and you will observe that the dough puffs up like a balloon in minute’s time. Flip it over again and cook on both sides.
Step 10:
Wrap it in a tea towel as soon as it comes out of the oven or skillet to keep it soft.
Step 11:
Pita bread tastes best when still warm.
Variations
Garlic Herb Pita
Brush freshly baked homemade pita bread with a mixture of melted butter, minced garlic, and chopped fresh parsley immediately after baking. The warmth of the bread absorbs the butter instantly, creating an irresistible aromatic flatbread perfect alongside grilled meats or dips.
Whole Wheat Pita
For a heartier, more nutritious version, replace the all-purpose flour entirely with whole wheat flour. The texture will be slightly denser, but the earthy, nutty flavor is incredibly satisfying. This variation pairs beautifully with hummus, baba ganoush, or any Mediterranean-style spread.
Spiced Pita Chips
Cut leftover pita flatbread into triangles, brush with olive oil, sprinkle with za’atar or smoked paprika, and bake at 180°C until crispy. These homemade pita chips make an addictive snack and are a brilliant way to use pita that has dried out slightly.
Storage and Serving
Homemade pita bread stores remarkably well with the right approach. Once completely cooled, stack the pitas and place them in an airtight zip-lock bag or container at room temperature. They stay soft and fresh for up to two days. For longer storage, freeze them in a sealed freezer bag for up to one month. To reheat, wrap in a damp paper towel and microwave for 20-30 seconds, or warm directly on a hot skillet for about one minute per side.
For serving, the possibilities are endless. Stuff them with grilled chicken, fresh vegetables, and tzatziki for a satisfying wrap. Serve them warm alongside hummus, falafel, or shakshuka for a complete Middle Eastern-inspired meal. They also pair beautifully with soups, stews, and salads as a soft, tear-and-dip bread.
FAQs
Why didn’t my pita bread puff up?
The most common reasons are insufficient heat or under-proofed dough. Ensure your baking stone or skillet is thoroughly preheated and that the dough has completed both proofing stages.
Can I make this recipe without a baking stone?
Yes. A heavy cast iron skillet or an inverted baking tray preheated in the oven works as an effective substitute for a baking stone.
Can I use instant yeast instead of active dry yeast?
Yes, instant yeast works well in this recipe. You can skip the activation step and mix it directly with the dry ingredients, then add the warm water.
How do I know if my yeast is still active?
After dissolving yeast in warm water with a pinch of sugar, it should become foamy within 5-10 minutes. If no foam appears, your yeast may be expired.
Can I prepare the dough the night before?
Absolutely. After the first knead, place the dough in an oiled bowl, cover tightly, and refrigerate overnight. Allow it to come to room temperature before shaping and proceeding with the second proof.
Homemade Pita Bread
- Prep Time: 15 mins
- Cook Time: 30 mins
- Total Time: 45 mins
- Yield: 4 people 1x
- Category: Appetizer
- Method: Cooking
- Cuisine: American
Description
Discover how to make Homemade Pita Bread with this easy recipe! Create delicious, fluffy pitas at home today.
Ingredients
- 2 cups All purpose Flour plus 1/2 cup for dusting
- 1/2 cup Whole Wheat Flour
- 1 tbsp Sugar
- 1 tsp Salt
- 1 tbsp Olive OIl
- 2 tsp Yeast ((refer notes))
- 1 cup Warm Water
Instructions
- Step 1: Combine all-purpose flour, wheat flour, salt and sugar in a mixing bowl. Stir to mix.
- Step 2: Add the yeast to warm water and stir to dissolve completely. Pour this in the mixing bowl along with olive oil and then combine everything into a sticky mass.
- Step 3: Transfer to your worktop dust with additional flour and knead for 8-10 mins until you get a soft and tacky dough. (Refer the detailed instructions from the above paragraphs).
- Step 4: Lightly oil the same mixing bowl. Transfer the dough into it, coat it with olive oil from all sides to refrain it from drying and then allow it for first proofing -2 hours.
- Step 5: After 2 hours lightly deflate the gas and divide the dough into 10 equal parts. Tuck the sides in of it and give it a round shape. Press in the centre and cover with a tea towel. Repeat the process until you shape all of them into roundels.
- Step 6: Take the first dough that you shaped and roll it thinly and evenly to 6 inches in diameter. Place it on a baking tray lined with parchment paper and cover with a tea towel.
- Step 7: Once you have rolled out all the roundels allow it for second proofing – 30 mins.
- Step 8: Preheat the oven to 230 degree Celsius with the baking stone inside. Right before baking flip the rolled out dough on to the stone and bake for 4-5 mins until it is nicely puffed up.
- Step 9: To make it on a stovetop make sure that the skillet is hot. Flip the rolled out dough and place it on the hot skillet. After about 20 sec flip the dough and you will observe that the dough puffs up like a balloon in minute’s time. Flip it over again and cook on both sides.
- Step 10: Wrap it in a tea towel as soon as it comes out of the oven or skillet to keep it soft.
- Step 11: Pita bread tastes best when still warm.
Notes
Try This Recipe and Leave a comment Below, your opinion matters to me!
Nutrition
- Serving Size: 4 serving
- Calories: 400
- Sugar: 5g
- Sodium: 400mg
- Fat: 10g
- Saturated Fat: 3g
- Unsaturated Fat: 7g
- Trans Fat: 0g
- Carbohydrates: 40g
- Fiber: 5g
- Protein: 15g
- Cholesterol: 50mg