
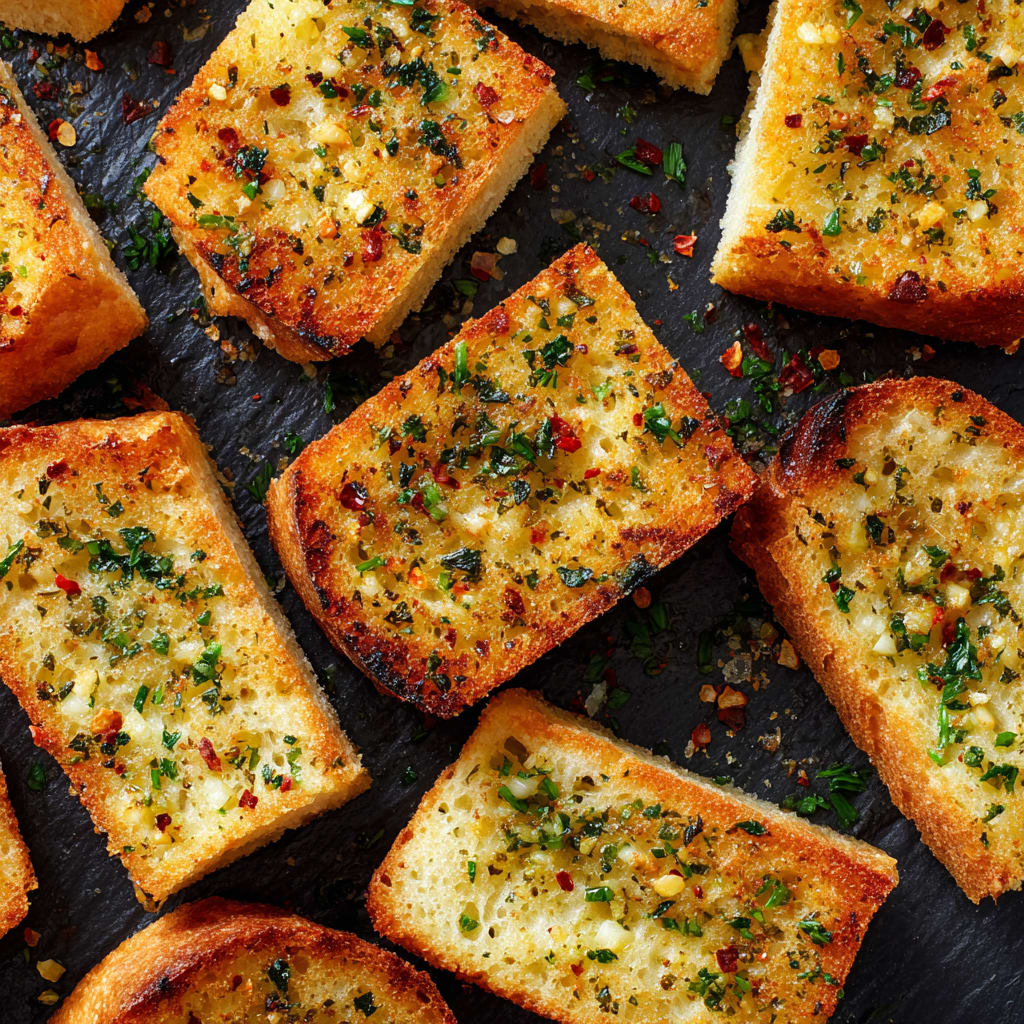
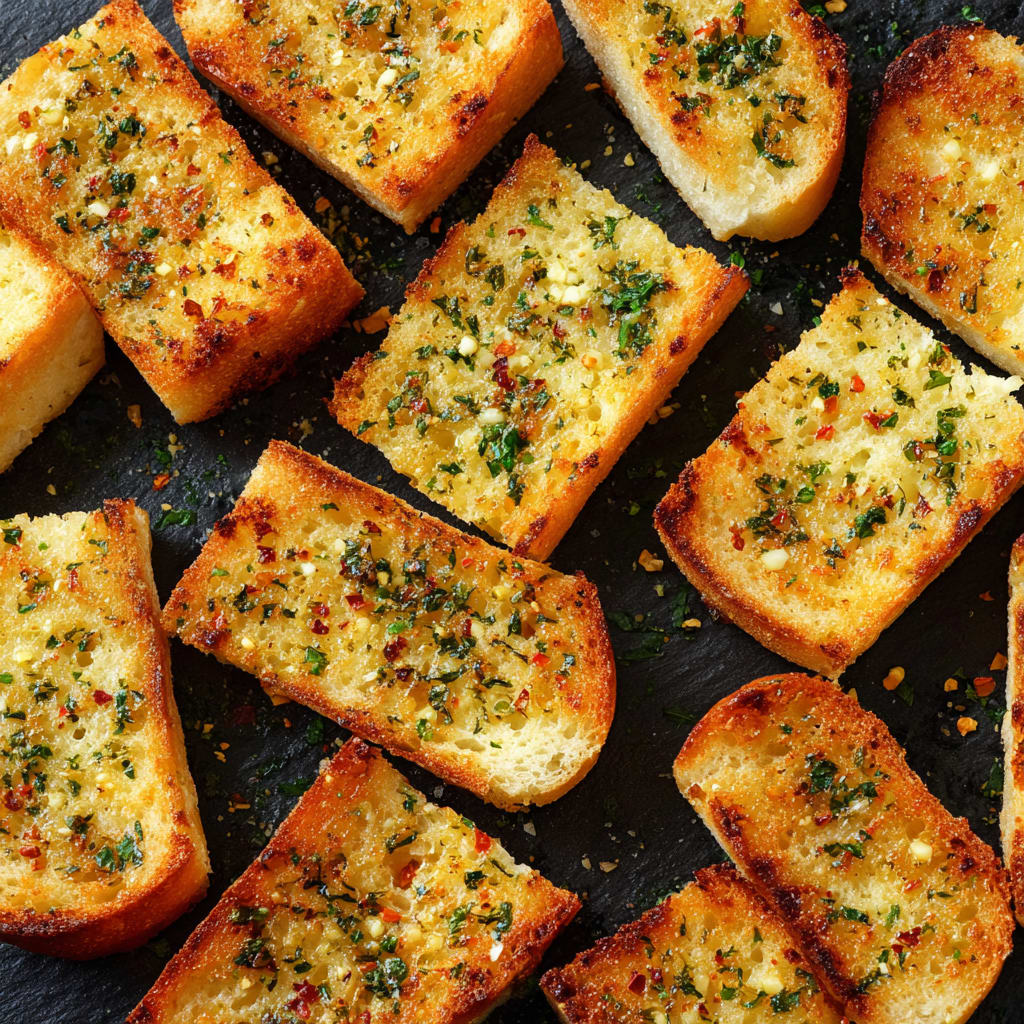
The aroma of buttery, garlic bread fresh from the oven is simply irresistible – that perfect combination of crispy exterior and soft, pillowy interior that makes mouths water before the first bite. This homemade garlic bread recipe transforms a simple French loaf into a flavor-packed side dish that outshines anything you’ll find in the frozen food aisle. Whether paired with pasta, soups, or enjoyed on its own, this classic garlic bread delivers that restaurant-quality experience right in your kitchen. You’ll learn exactly how to achieve the perfect balance of garlic, butter, and herbs for a crowd-pleasing side that disappears within minutes of hitting the table.
Why You’ll Love This Recipe
This garlic bread recipe stands out from others for several compelling reasons. First, it strikes the perfect balance between simplicity and flavor – using just a handful of ingredients that transform into something extraordinary. The contrast between the crispy, golden-brown edges and the soft, butter-soaked interior creates a textural experience that’s absolutely addictive.
Unlike store-bought versions that often taste artificial or overly processed, this homemade garlic bread delivers authentic flavor with real garlic and butter. The method of allowing the garlic to steep in warm butter ensures the flavor infuses perfectly throughout without any harsh, raw garlic bite.
Perhaps best of all, this recipe is incredibly forgiving and adaptable. Even novice cooks can achieve impressive results, and you can easily adjust the garlic intensity, butter amount, or add cheese to suit your preferences. It’s ready in just 20 minutes, making it the perfect last-minute addition to elevate any meal from ordinary to memorable.
Ingredients List for the Garlic Bread Recipe
These simple yet powerful ingredients work together to create that classic garlic bread flavor. The soft French bread provides the perfect canvas for the rich, aromatic garlic butter to shine.
- 1 (14 to 16-ounce) loaf soft French bread (not baguette)
- 3/4 cup unsalted butter
- 4 large cloves garlic (finely minced; about 2 tablespoons minced)
- 1/2 teaspoon salt
- 1 tablespoon dried parsley flakes
Pro Tips
For truly exceptional garlic bread, these three techniques make all the difference:
Butter temperature matters: Allow your butter to fully melt before adding the garlic, but keep the heat low to prevent burning. This slow melting process creates a better infusion base, allowing the butter to extract maximum flavor from the garlic. The warm-but-not-hot butter gently cooks the garlic, removing its raw edge while preserving its aromatic properties.
The garlic steeping technique: Don’t skip the 3-minute steeping time. This crucial step allows the garlic to mellow slightly and infuse the butter completely. Think of it like making tea – the longer the garlic “steeps” in the warm butter, the more flavorful your finished bread will be. For extra flavor, you can even steep for 5-7 minutes if time permits.
Two-stage baking approach: The initial bake at 400°F perfectly cooks the bread through, while the optional broiling stage creates that irresistible golden-brown finish with slight charring that enhances flavor. If using the broiler, position the rack about 6 inches from the heat source and watch constantly to prevent burning.
Instructions
Step 1: Preheat the oven to 400°F and line a rimmed baking sheet with aluminum foil.
Step 2: Slice loaf of bread in half and place the pieces, cut side up, on the prepared pan.
Step 3: In a small saucepan over low heat, melt the butter. Once melted, add the garlic and remove from the heat. Allow the garlic to steep in the butter for about 3 minutes. Add the salt and parsley and stir to combine. Use a spoon or pastry brush to coat the cut sides of the bread with the garlic butter.
Step 4: Bake for 15 minutes or until the edges are golden brown. For extra crispiness, place under the broiler for 2 to 3 minutes, watching very carefully. Slice and serve warm.
Variations
Cheesy Garlic Bread: Transform this classic garlic bread recipe into an even more indulgent treat by adding cheese. After brushing the bread with garlic butter, sprinkle generously with 1-1½ cups of shredded mozzarella, Parmesan, or an Italian cheese blend before baking. For an extra kick, add a pinch of red pepper flakes to the cheese topping.
Herb-Loaded Version: Elevate your garlic bread with fresh herbs. Replace the dried parsley with 2 tablespoons of freshly chopped herbs like basil, oregano, thyme, or rosemary. This variation creates a more aromatic, garden-fresh flavor profile that pairs beautifully with summer meals and grilled dishes.
Whole Grain Option: For a healthier twist, swap the traditional French bread for a whole grain alternative. While the texture will be slightly different, whole grain breads provide more fiber and nutrients. You might want to add an extra tablespoon of butter to ensure the bread doesn’t dry out during baking.
Storage and Serving
Freshly baked garlic bread is at its absolute best when served immediately, while the exterior remains crispy and the interior is still warm and soft. However, if you need to prepare ahead, you can make the garlic butter up to three days in advance and store it covered in the refrigerator. Simply warm it until spreadable before using.
For leftovers (if you’re lucky enough to have any!), allow the garlic bread to cool completely, then wrap tightly in aluminum foil and store at room temperature for up to 24 hours. To reheat, place the wrapped bread in a 350°F oven for 5-10 minutes until warmed through. Avoid using the microwave for reheating as it will make the bread soggy.
Serve your garlic bread alongside classic Italian pasta dishes like spaghetti bolognese or fettuccine alfredo, where it’s perfect for soaking up extra sauce. It also makes an excellent companion to hearty soups, particularly tomato or minestrone. For a simple appetizer, slice the bread into smaller portions and serve with a side of marinara sauce for dipping.
FAQs
Can I use a baguette instead of French bread?
While technically you can, we don’t recommend it for this particular garlic bread recipe. Baguettes have a crustier exterior and less soft interior, resulting in a different texture. The soft French bread specified provides that ideal balance of crisp exterior and pillowy interior that makes great garlic bread.
How do I prevent my garlic from burning?
The key is removing the butter from heat before adding the garlic. Burnt garlic becomes bitter and can ruin your garlic bread. The residual heat in the butter is sufficient to mellow the garlic without burning it during the steeping process.
Can I make this recipe dairy-free?
Absolutely! Substitute the butter with a high-quality plant-based butter alternative (not margarine). Brands specifically made for baking work best as they mimic the fat content of real butter.
Is fresh garlic really better than garlic powder?
Yes! Fresh garlic provides significantly more flavor complexity and aroma for this garlic bread recipe. If you must use garlic powder in a pinch, substitute the 4 cloves with 1-1½ teaspoons of powder, but expect a less vibrant flavor profile.
Can I prepare this recipe in advance?
For best results, prepare the garlic butter mixture ahead of time and store it in the refrigerator. When ready to serve, spread it on the bread and bake fresh. Pre-baked garlic bread loses its ideal texture even when reheated.
This homemade garlic bread recipe strikes the perfect balance between simplicity and incredible flavor. With just a handful of ingredients and some simple techniques, you’ll create a side dish that might just steal the spotlight from your main course. Whether you’re serving a fancy Italian dinner or a casual weeknight meal, this versatile classic never disappoints!
Print
Garlic Bread Recipe
- Prep Time: 15 mins
- Cook Time: 30 mins
- Total Time: 45 mins
- Yield: 4 people 1x
- Category: Appetizer
- Method: Cooking
- Cuisine: American
Description
Looking for a delicious homemade Garlic Bread Recipe? Discover how to make this flavorful side dish in no time! Try it now!
Ingredients
- 1 (14 to 16-ounce) loaf soft French bread (not baguette)
- 3/4 cup unsalted butter
- 4 large cloves garlic (finely minced; about 2 tablespoons minced)
- 1/2 teaspoon salt
- 1 tablespoon dried parsley flakes
Instructions
- Step 1: Preheat the oven to 400°F and line a rimmed baking sheet with aluminum foil.
- Step 2: Slice loaf of bread in half and place the pieces, cut side up, on the prepared pan.
- Step 3: In a small saucepan over low heat, melt the butter. Once melted, add the garlic and remove from the heat. Allow the garlic to steep in the butter for about 3 minutes. Add the salt and parsley and stir to combine. Use a spoon or pastry brush to coat the cut sides of the bread with the garlic butter.
- Step 4: Bake for 15 minutes or until the edges are golden brown. For extra crispiness, place under the broiler for 2 to 3 minutes, watching very carefully. Slice and serve warm.
Notes
Try This Recipe and Leave a comment Below, your opinion matters to me!
Nutrition
- Serving Size: 4 serving
- Calories: 400
- Sugar: 5g
- Sodium: 400mg
- Fat: 10g
- Saturated Fat: 3g
- Unsaturated Fat: 7g
- Trans Fat: 0g
- Carbohydrates: 40g
- Fiber: 5g
- Protein: 15g
- Cholesterol: 50mg