
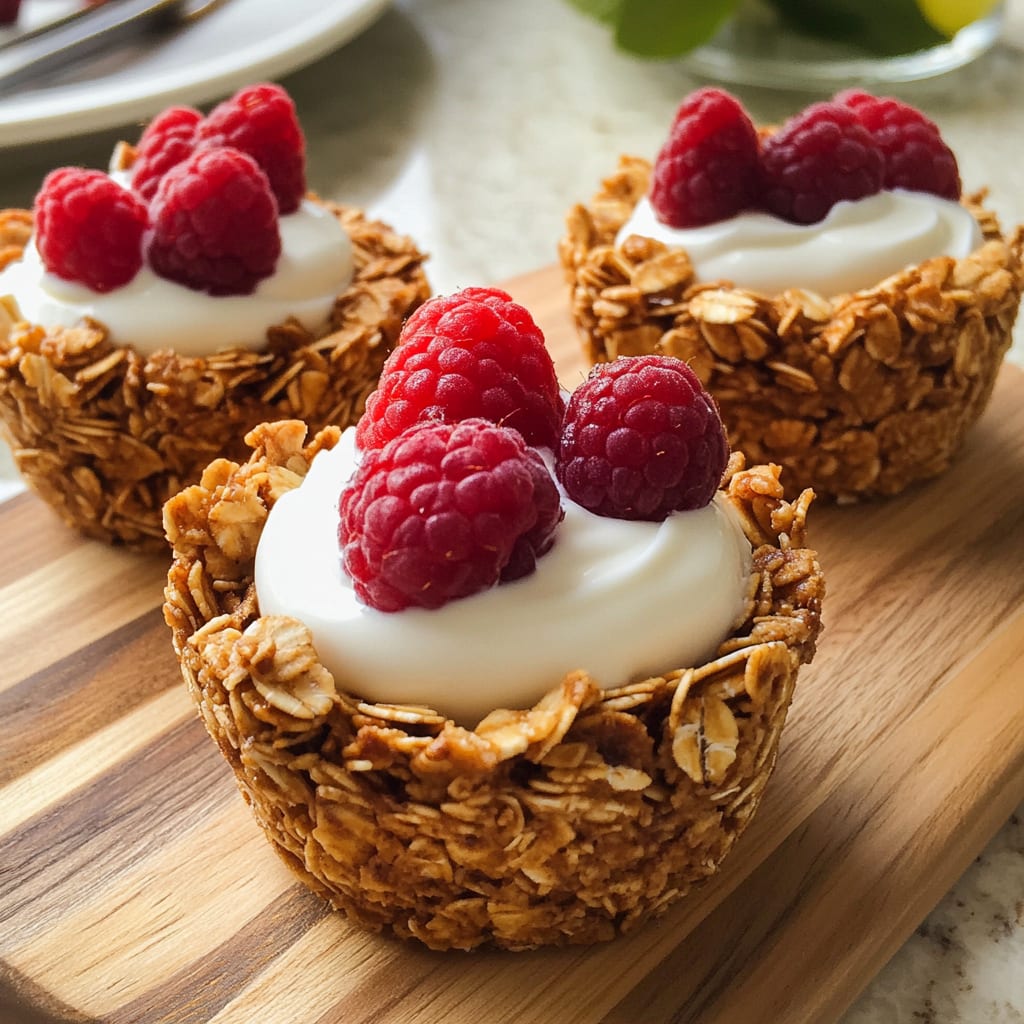
Imagine biting into a crunchy, golden-brown granola cup filled with creamy, luscious yogurt and topped with vibrant fresh fruits. These Yogurt Filled Granola Cups are the perfect balance of textures and flavors – crispy, sweet, tangy, and utterly irresistible. Whether you’re looking for a nutritious breakfast on-the-go, a delightful afternoon snack, or an impressive brunch option for guests, these beautiful cups deliver both nutrition and satisfaction in every bite. You’ll learn how to create perfectly shaped granola cups that hold their form, choose the ideal yogurt fillings, and customize these versatile treats to suit any preference.
Why You’ll Love This Recipe
There’s something uniquely satisfying about these Yogurt Filled Granola Cups that will make them a regular in your recipe rotation. The contrast between the crunchy, oat-based exterior and the silky-smooth yogurt center creates a textural masterpiece that keeps you coming back for more. They’re incredibly versatile – make them ahead for busy mornings or serve them as an elegant dessert alternative when entertaining.
The beauty of these granola yogurt cups lies in their simplicity and visual appeal. Unlike traditional parfaits, these handheld treats contain the perfect ratio of granola to yogurt in every bite. They’re also customizable to fit dietary preferences – easily made gluten-free, dairy-free, or adjusted to reduce sugar content.
Perhaps most importantly, these cups combine nutrition with indulgence. Packed with fiber from oats, protein from nuts and yogurt, and vitamins from fresh fruit, they’re a genuinely nourishing option that feels like a treat. The portable nature of these Yogurt Filled Granola Cups makes them perfect for meal prep, ensuring you have a healthy breakfast ready when you need it most.
Ingredients
For the granola cups (makes 12 medium cups):
- 2½ cups (250g) old-fashioned rolled oats
- ½ cup (60g) finely chopped nuts (almonds, walnuts, or pecans)
- ¼ cup (35g) seeds (sunflower, pumpkin, or flax)
- ⅓ cup (80ml) maple syrup or honey
- ¼ cup (60ml) coconut oil, melted
- 1 teaspoon vanilla extract
- ½ teaspoon ground cinnamon
- ¼ teaspoon salt
- 1 large egg white (helps bind the cups)
For the filling:
- 2 cups (480g) Greek yogurt (plain or vanilla)
- 2 tablespoons honey or maple syrup (if using plain yogurt)
- 1 cup (150g) fresh berries or chopped fruit
- ¼ cup (30g) additional granola for topping
The old-fashioned rolled oats provide the perfect sturdy base, while the combination of nuts and seeds adds protein and healthy fats. The egg white is crucial for binding the granola cups together, creating a shell that holds its shape while remaining crisp and delicious.
Pro Tips
Create Perfect Granola Cup Shapes
For consistent cups that hold their form, press the granola mixture firmly and evenly into each muffin cavity. Use the bottom of a small glass or measuring cup wrapped in plastic wrap to press down on the bottom and push the mixture up the sides. The granola should be about ¼-inch thick throughout. Don’t rush this step – proper shaping is critical for cups that don’t fall apart when filled.
Master the Baking Technique
The secret to crispy yet sturdy Yogurt Filled Granola Cups is in the baking process. Start by baking them at 325°F (165°C) rather than higher temperatures, which can burn the honey or maple syrup. After the initial baking, let the cups cool in the muffin tin for 15 minutes before carefully removing them. This cooling period is essential – it allows the cups to firm up and maintain their shape.
Prevent Soggy Cups with Proper Assembly
To keep your granola cups crispy, add a thin layer of nut butter or melted chocolate to the inside of the cooled cups before adding yogurt. This creates a moisture barrier that prevents the yogurt from making the granola soggy. Additionally, fill the cups with yogurt just before serving rather than hours in advance. If preparing for meal prep, store the cups and filling separately until ready to eat.
Instructions
Step 1: Prepare the Granola Mixture
Preheat your oven to 325°F (165°C) and generously grease a 12-cup muffin tin with cooking spray or coconut oil. In a large mixing bowl, combine the rolled oats, chopped nuts, and seeds. In a separate small bowl, whisk together the maple syrup (or honey), melted coconut oil, vanilla extract, cinnamon, and salt until fully incorporated. Pour this wet mixture over the dry ingredients and stir until everything is evenly coated. Add the egg white and mix thoroughly – this will help your Yogurt Filled Granola Cups hold their shape perfectly.
Step 2: Shape the Granola Cups
Divide the mixture evenly among the 12 muffin cups (about 3-4 tablespoons per cup). Using your fingers, press the mixture firmly into the bottom of each cup and up the sides, creating a well in the center. For perfect shaping, take a small glass or spice jar wrapped in plastic wrap and press it into the center of each cup to create an even depression. Make sure the sides are compressed and even in thickness to prevent breaking later.
Step 3: Bake the Cups
Bake the granola cups in your preheated oven for 15-18 minutes until they turn golden brown around the edges. Keep a close eye on them as they can quickly go from perfect to over-browned. Once baked, remove from the oven but leave them in the muffin tin to cool for 15 minutes. This cooling period is crucial for the cups to set properly. After initial cooling, run a butter knife gently around the edges of each cup and carefully remove them from the tin. Allow them to cool completely on a wire rack.
Step 4: Prepare the Filling and Assemble
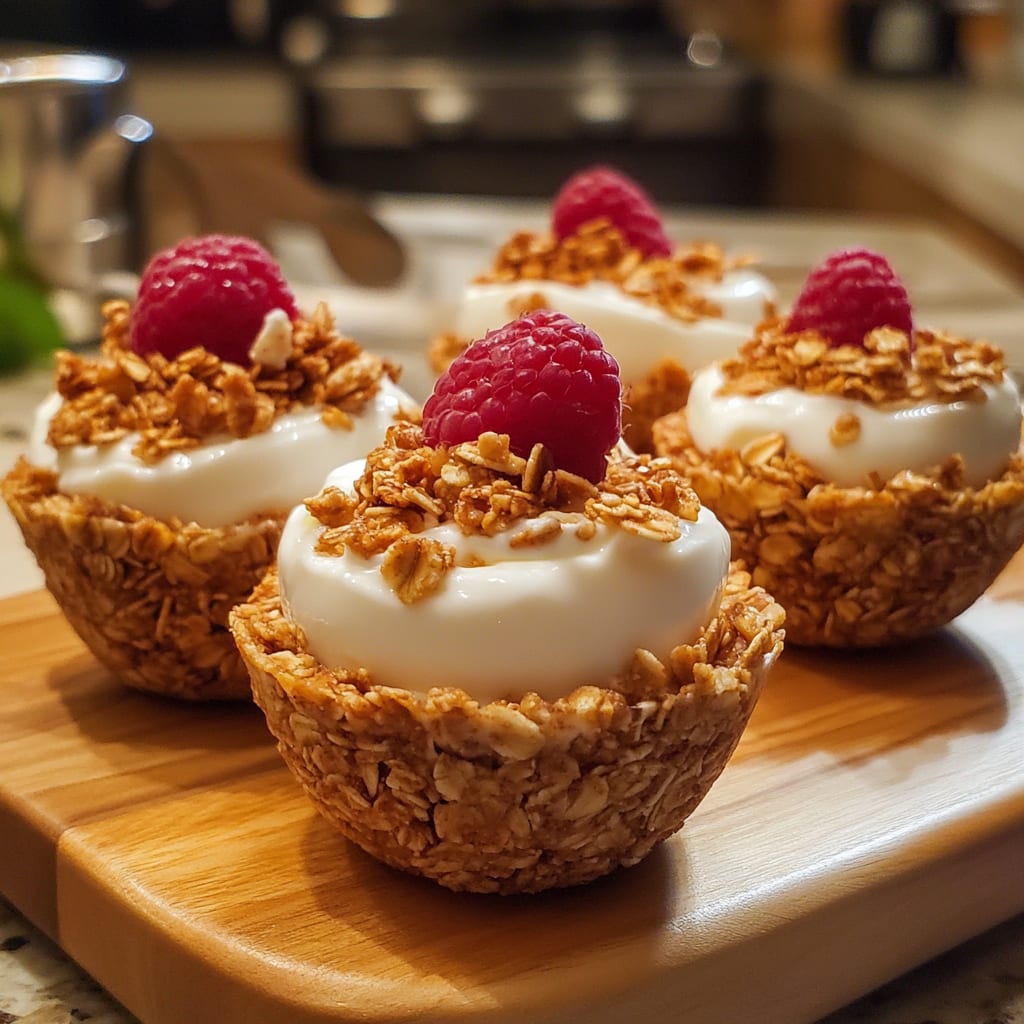
While the cups cool, prepare your yogurt filling. If using plain Greek yogurt, stir in honey or maple syrup to taste. When ready to serve, spoon approximately 2-3 tablespoons of yogurt into each granola cup. Top with fresh berries or chopped fruit of your choice. For added crunch, sprinkle a small amount of extra granola on top. For the most impressive presentation, add the yogurt just before serving to maintain the cup’s crispness.
Variations
Tropical Yogurt Cups
Transform your Yogurt Filled Granola Cups into a vacation-worthy treat by using coconut yogurt as your base. Add diced mango, pineapple, and kiwi on top, then sprinkle with toasted coconut flakes. Include a touch of lime zest in the yogurt for a citrusy brightness that complements the tropical fruits perfectly. This variation works wonderfully for summer brunches or when you need a mental escape to an island paradise.
Dessert Granola Cups
For a more indulgent version, turn these granola yogurt cups into a healthier dessert alternative. Use vanilla Greek yogurt mixed with a touch of cinnamon, then top with sliced bananas, a drizzle of melted dark chocolate, and a sprinkle of chopped hazelnuts. You can also add a layer of homemade chocolate-hazelnut spread between the cup and yogurt for an extra special treat that still provides nutritional benefits.
Savory-Sweet Option
For those who prefer less sweetness, create a savory-leaning version of these Yogurt Filled Granola Cups. Reduce the sweetener in the granola mixture and add dried herbs like rosemary or thyme. Fill with plain Greek yogurt mixed with a touch of lemon zest, olive oil, and cracked black pepper. Top with diced cucumber, cherry tomatoes, and a sprinkle of za’atar or everything bagel seasoning for a Mediterranean-inspired breakfast or appetizer.
Storage and Serving
The unfilled granola cups can be stored in an airtight container at room temperature for up to 1 week. For longer storage, place them in a freezer-safe container with parchment paper between layers and freeze for up to 3 months. When ready to use, simply thaw at room temperature for about 30 minutes before filling.
For the best texture contrast, fill your Yogurt Filled Granola Cups just before serving. However, if you need to prepare them in advance, you can assemble them up to 2 hours before serving and refrigerate. The yogurt will slightly soften the granola, creating a more cake-like texture that’s still delicious.
These versatile treats shine in multiple settings. Serve them at brunch arranged on a platter with various fruit toppings for a colorful display. Pack them separately (cups and yogurt) for picnics or lunch boxes, allowing for assembly just before eating. For an elegant dessert alternative, arrange smaller granola cups on a serving board alongside bowls of different yogurt flavors and toppings, allowing guests to create their own combinations.
FAQs
Can I make these granola cups gluten-free?
Yes! Simply use certified gluten-free oats in your Yogurt Filled Granola Cups. All other ingredients in the basic recipe are naturally gluten-free, but always check packaged items like nuts and seeds to ensure they weren’t processed in facilities with gluten-containing products.
Why are my granola cups falling apart?
This typically happens if the mixture isn’t compressed firmly enough or if there’s not enough binding agent. Make sure to press the mixture very firmly into the muffin tin and don’t skip the egg white, which is crucial for binding. Let the cups cool completely before removing them from the tin.
Can I use regular yogurt instead of Greek yogurt?
Regular yogurt is too thin for Yogurt Filled Granola Cups and may make them soggy. If you only have regular yogurt, strain it through a coffee filter or cheesecloth in the refrigerator for several hours to remove excess liquid.
How can I make these vegan?
Replace the egg white with 2 tablespoons of aquafaba (chickpea liquid) or a flax egg (1 tablespoon ground flaxseed mixed with 3 tablespoons water, left to gel for 10 minutes). Use maple syrup instead of honey and choose plant-based yogurt alternatives.
Can I make mini granola cups for a party?
Absolutely! Use a mini muffin tin and reduce the baking time to 10-12 minutes. These bite-sized granola cups make perfect party appetizers or desserts and are great for serving a crowd.
Conclusion
These Yogurt Filled Granola Cups are comfort food reinvented for the health-conscious — crunchy, creamy, and infinitely customizable while still delivering wholesome nutrition. They’re the kind of dish that transforms ordinary mornings into special moments, bridging the gap between convenience and indulgence. Whether you’re seeking a make-ahead breakfast solution, an impressive brunch offering, or a healthier dessert alternative, these delightful cups deliver on all fronts while bringing joy to your table.
Print
Yogurt Filled Granola Cups
Description
Yogurt Filled Granola Cups: Crunchy oats and nuts filled with creamy yogurt. Quick, healthy, and crowd-pleasing breakfast bites.
Ingredients
- 2½ cups old-fashioned rolled oats
- ½ cup finely chopped nuts (almonds, walnuts, or pecans)
- ¼ cup seeds (sunflower, pumpkin, or flax)
- ⅓ cup maple syrup or honey
- ¼ cup coconut oil, melted
- 1 teaspoon vanilla extract
- ½ teaspoon ground cinnamon
- ¼ teaspoon salt
- 1 large egg white
- 2 cups Greek yogurt (plain or vanilla)
- 2 tablespoons honey or maple syrup (if using plain yogurt)
- 1 cup fresh berries or chopped fruit
- ¼ cup additional granola for topping
Instructions
- Step 1: Prepare the Granola Mixture Preheat your oven to 325°F (165°C) and generously grease a 12-cup muffin tin with cooking spray or coconut oil. In a large mixing bowl, combine the rolled oats, chopped nuts, and seeds. In a separate small bowl, whisk together the maple syrup (or honey), melted coconut oil, vanilla extract, cinnamon, and salt until fully incorporated. Pour this wet mixture over the dry ingredients and stir until everything is evenly coated. Add the egg white and mix thoroughly – this will help your Yogurt Filled Granola Cups hold their shape perfectly.
- Step 2: Shape the Granola Cups Divide the mixture evenly among the 12 muffin cups (about 3-4 tablespoons per cup). Using your fingers, press the mixture firmly into the bottom of each cup and up the sides, creating a well in the center. For perfect shaping, take a small glass or spice jar wrapped in plastic wrap and press it into the center of each cup to create an even depression. Make sure the sides are compressed and even in thickness to prevent breaking later.
- Step 3: Bake the Cups Bake the granola cups in your preheated oven for 15-18 minutes until they turn golden brown around the edges. Keep a close eye on them as they can quickly go from perfect to over-browned. Once baked, remove from the oven but leave them in the muffin tin to cool for 15 minutes. This cooling period is crucial for the cups to set properly. After initial cooling, run a butter knife gently around the edges of each cup and carefully remove them from the tin. Allow them to cool completely on a wire rack.
- Step 4: Prepare the Filling and Assemble While the cups cool, prepare your yogurt filling. If using plain Greek yogurt, stir in honey or maple syrup to taste. When ready to serve, spoon approximately 2-3 tablespoons of yogurt into each granola cup. Top with fresh berries or chopped fruit of your choice. For added crunch, sprinkle a small amount of extra granola on top. For the most impressive presentation, add the yogurt just before serving to maintain the cup’s crispness.